🔐 Getting Started with Keystone 3 Pro: A Comprehensive Guide

Introduction
Welcome to the ultimate guide for setting up and using the Keystone 3 Pro hardware wallet. Whether you are new to hardware wallets or a seasoned user looking for a secure and feature-rich upgrade, the Keystone 3 Pro is designed to meet your needs.
This guide will walk you through everything from the initial setup to integrating with the Nunchuk app for secure Bitcoin transactions. By the end of this post, you will be well-equipped to make the most out of your Keystone 3 Pro and ensure your digital assets are safely stored.
What is the Keystone 3 Pro?
The Keystone 3 Pro is a state-of-the-art hardware wallet designed to provide maximum security for your digital assets. Unlike software wallets, hardware wallets like the Keystone 3 Pro store your private keys offline, offering a significant security advantage against online threats.
Key Features of Keystone 3 Pro
- Open-Source: The Keystone 3 Pro is fully open-sourced under the MIT license, meaning its firmware is publicly accessible and can be reviewed by anyone. This transparency helps ensure there are no hidden vulnerabilities. For those interested, you can check out the firmware on GitHub. The wallet has also been audited by security firms SlowMist and Keylabs, providing an added layer of assurance. Full details on these audits can be found here.
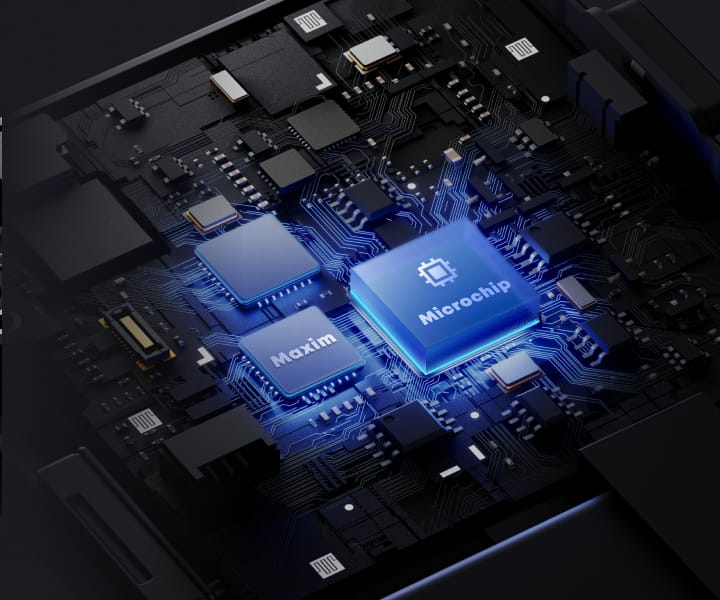
- Triple-Layered Security: The Keystone 3 Pro has three Secure Element (SE) chips from different manufacturers: the Microchip ATECC608B, Maxim DS28S60, and Maxim MAX32520. These chips work together to create a secure environment for storing your seed phrases and fingerprint data, making it one of the most secure hardware wallets.
- The Microchip ATECC608B and Maxim DS28S60 are specifically designed to protect seed phrases by providing hardware-level security and ensuring a trusted platform module. The Maxim MAX32520 secures fingerprint data, adding another layer of biometric protection. This blog post provides more detail.
- Embedded System: Unlike its predecessors, the Keystone 3 Pro has transitioned from an Android-based system to an embedded system. This change significantly enhances security by reducing the attack surface and improving system stability.
- PCI-Grade Anti-Tampering Mechanism: The Keystone 3 Pro has a PCI-grade anti-tampering mechanism. This means all core Integrated Circuits (IC) and Secure Element chips are protected by a 'security house' filled with complex circuitry. If tampering is detected, all sensitive data is automatically erased, safeguarding your assets against physical attacks.
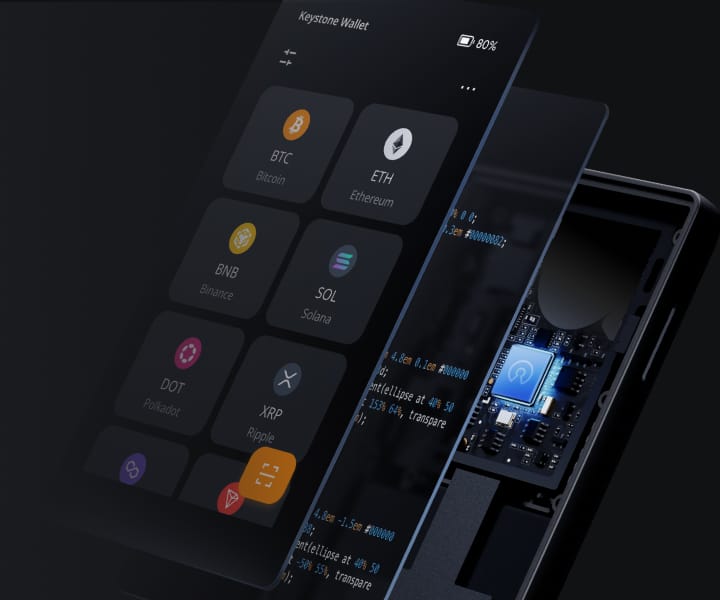
- Bitcoin-Only Firmware: For Bitcoin maximalists, the Keystone 3 Pro offers a Bitcoin-only firmware option. This version minimizes the codebase and attack surface, making Bitcoin transactions simpler and more secure. More details about this firmware can be found on their webpage. This is the firmware we'll be using during our setup process.
2. Setting Up Your Keystone 3 Pro
Setting up your Keystone 3 Pro is straightforward. Follow these steps to get started:
Unboxing and Charging
Upon unboxing your Keystone 3 Pro, you will find the hardware wallet, a USB cable, and a user manual. Before setup, ensure the device is fully charged by connecting it to a power source using the provided USB cable.
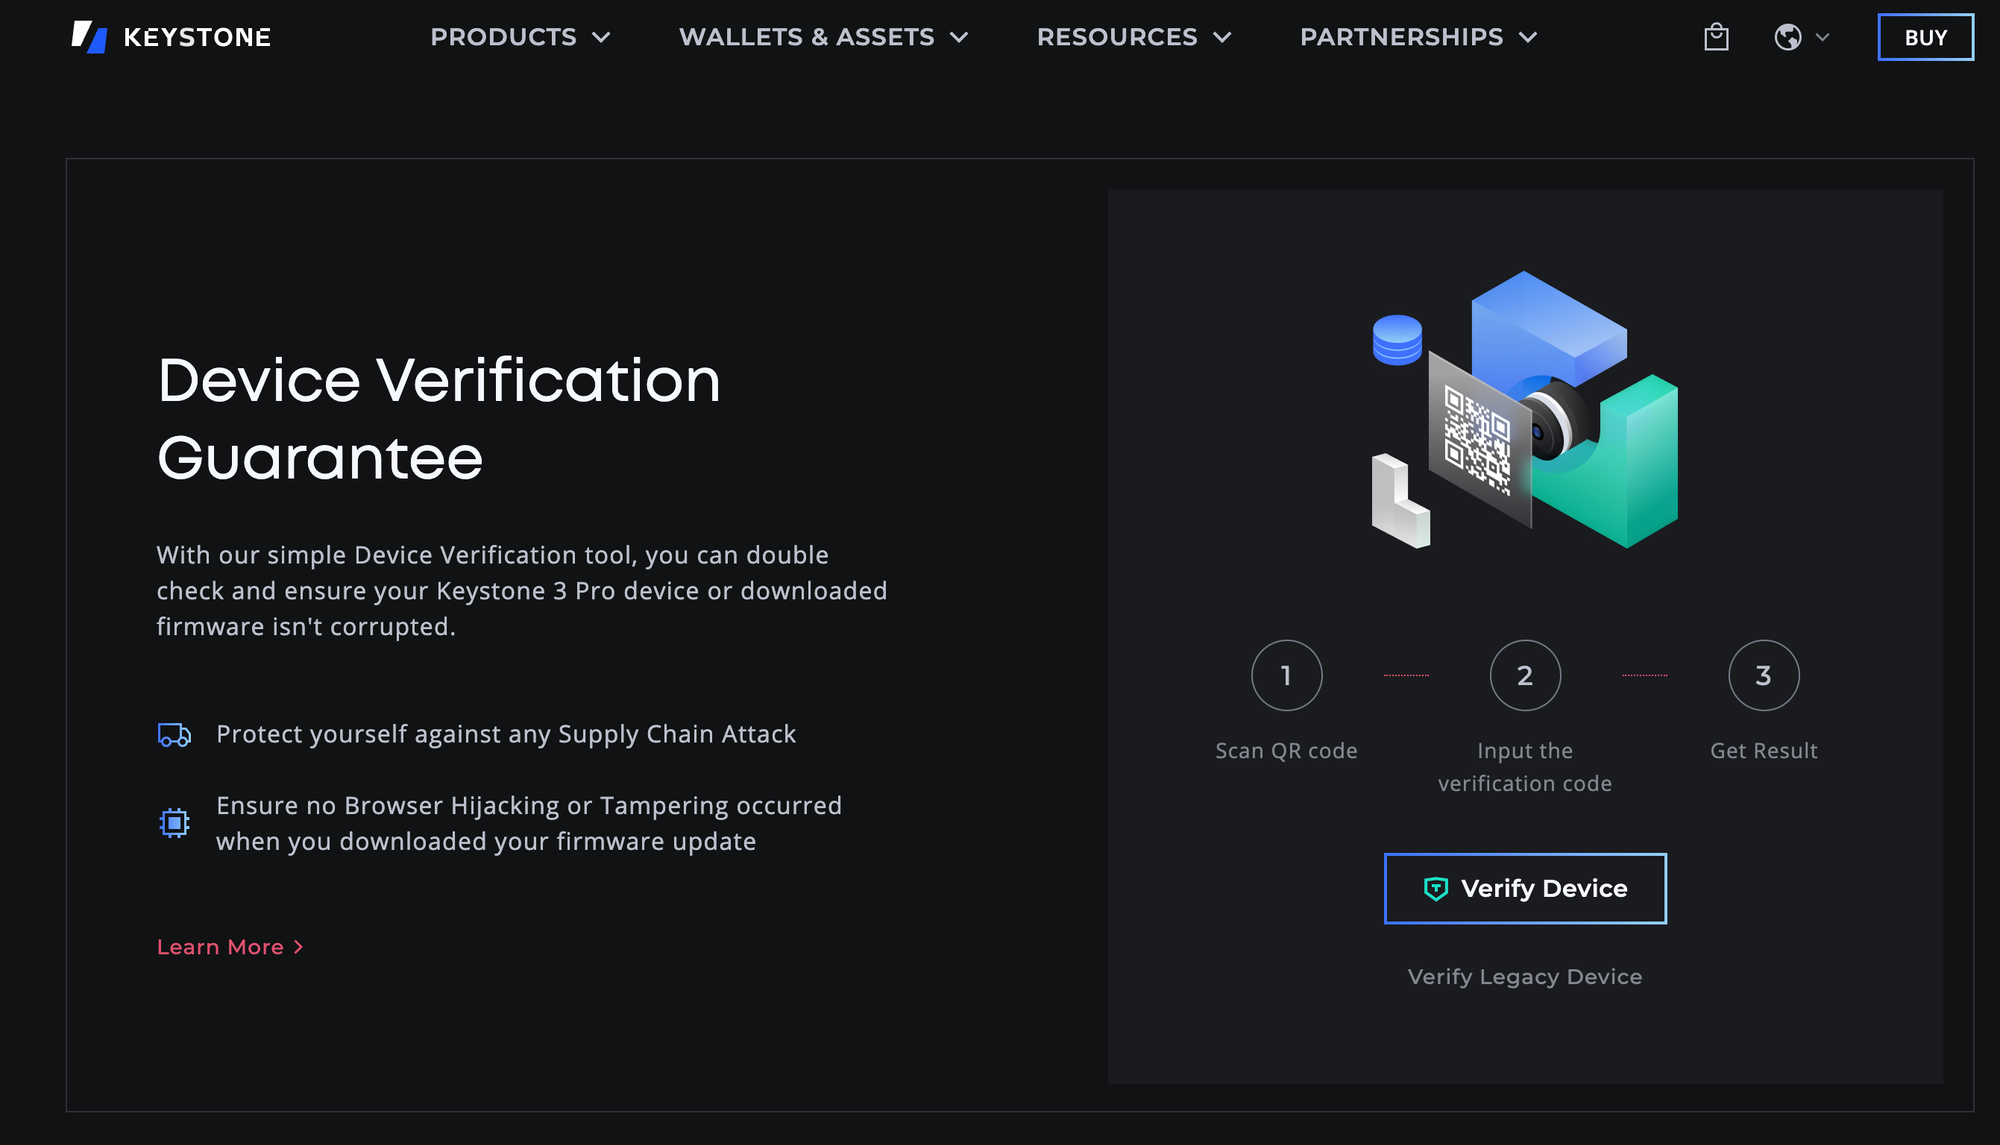
Device Verification
Device verification is critical to ensure your Keystone 3 Pro has not been tampered with during shipping. Here’s how to verify your device:
- Visit the Device Verification page on the Keystone website.
- Click on "Scan QR Code" on the website.
- Use the camera on your Keystone 3 Pro to scan the QR code displayed on the website.
- A verification code will appear on your Keystone screen. Enter this code on the website to complete the verification process.
Firmware Update
Keeping your device firmware up-to-date is crucial for security and accessing new features. The Keystone 3 Pro allows you to update the firmware via a MicroSD card or USB:
- Update via MicroSD Card (Airgapped):
- Ensure your Keystone 3 Pro has 20% battery.
- Download the latest firmware version from the Keystone Firmware Upgrade page and save the file to a MicroSD card.
- Insert the MicroSD card into the Keystone 3 Pro and follow the on-screen instructions to complete the update.
- Update via USB:
- If your firmware version is below 1.0.4, perform the initial update using a MicroSD card.
- Once updated, you can use the USB cable for future updates. Connect your Keystone 3 Pro to a computer, visit the Firmware Upgrade page, and follow the instructions to install the latest firmware.

Creating or Importing a Wallet
To start using your Keystone 3 Pro, you will need to create a new wallet or import an existing one:
- Creating a New Wallet:
- Select "Create New Wallet" on your Keystone device.
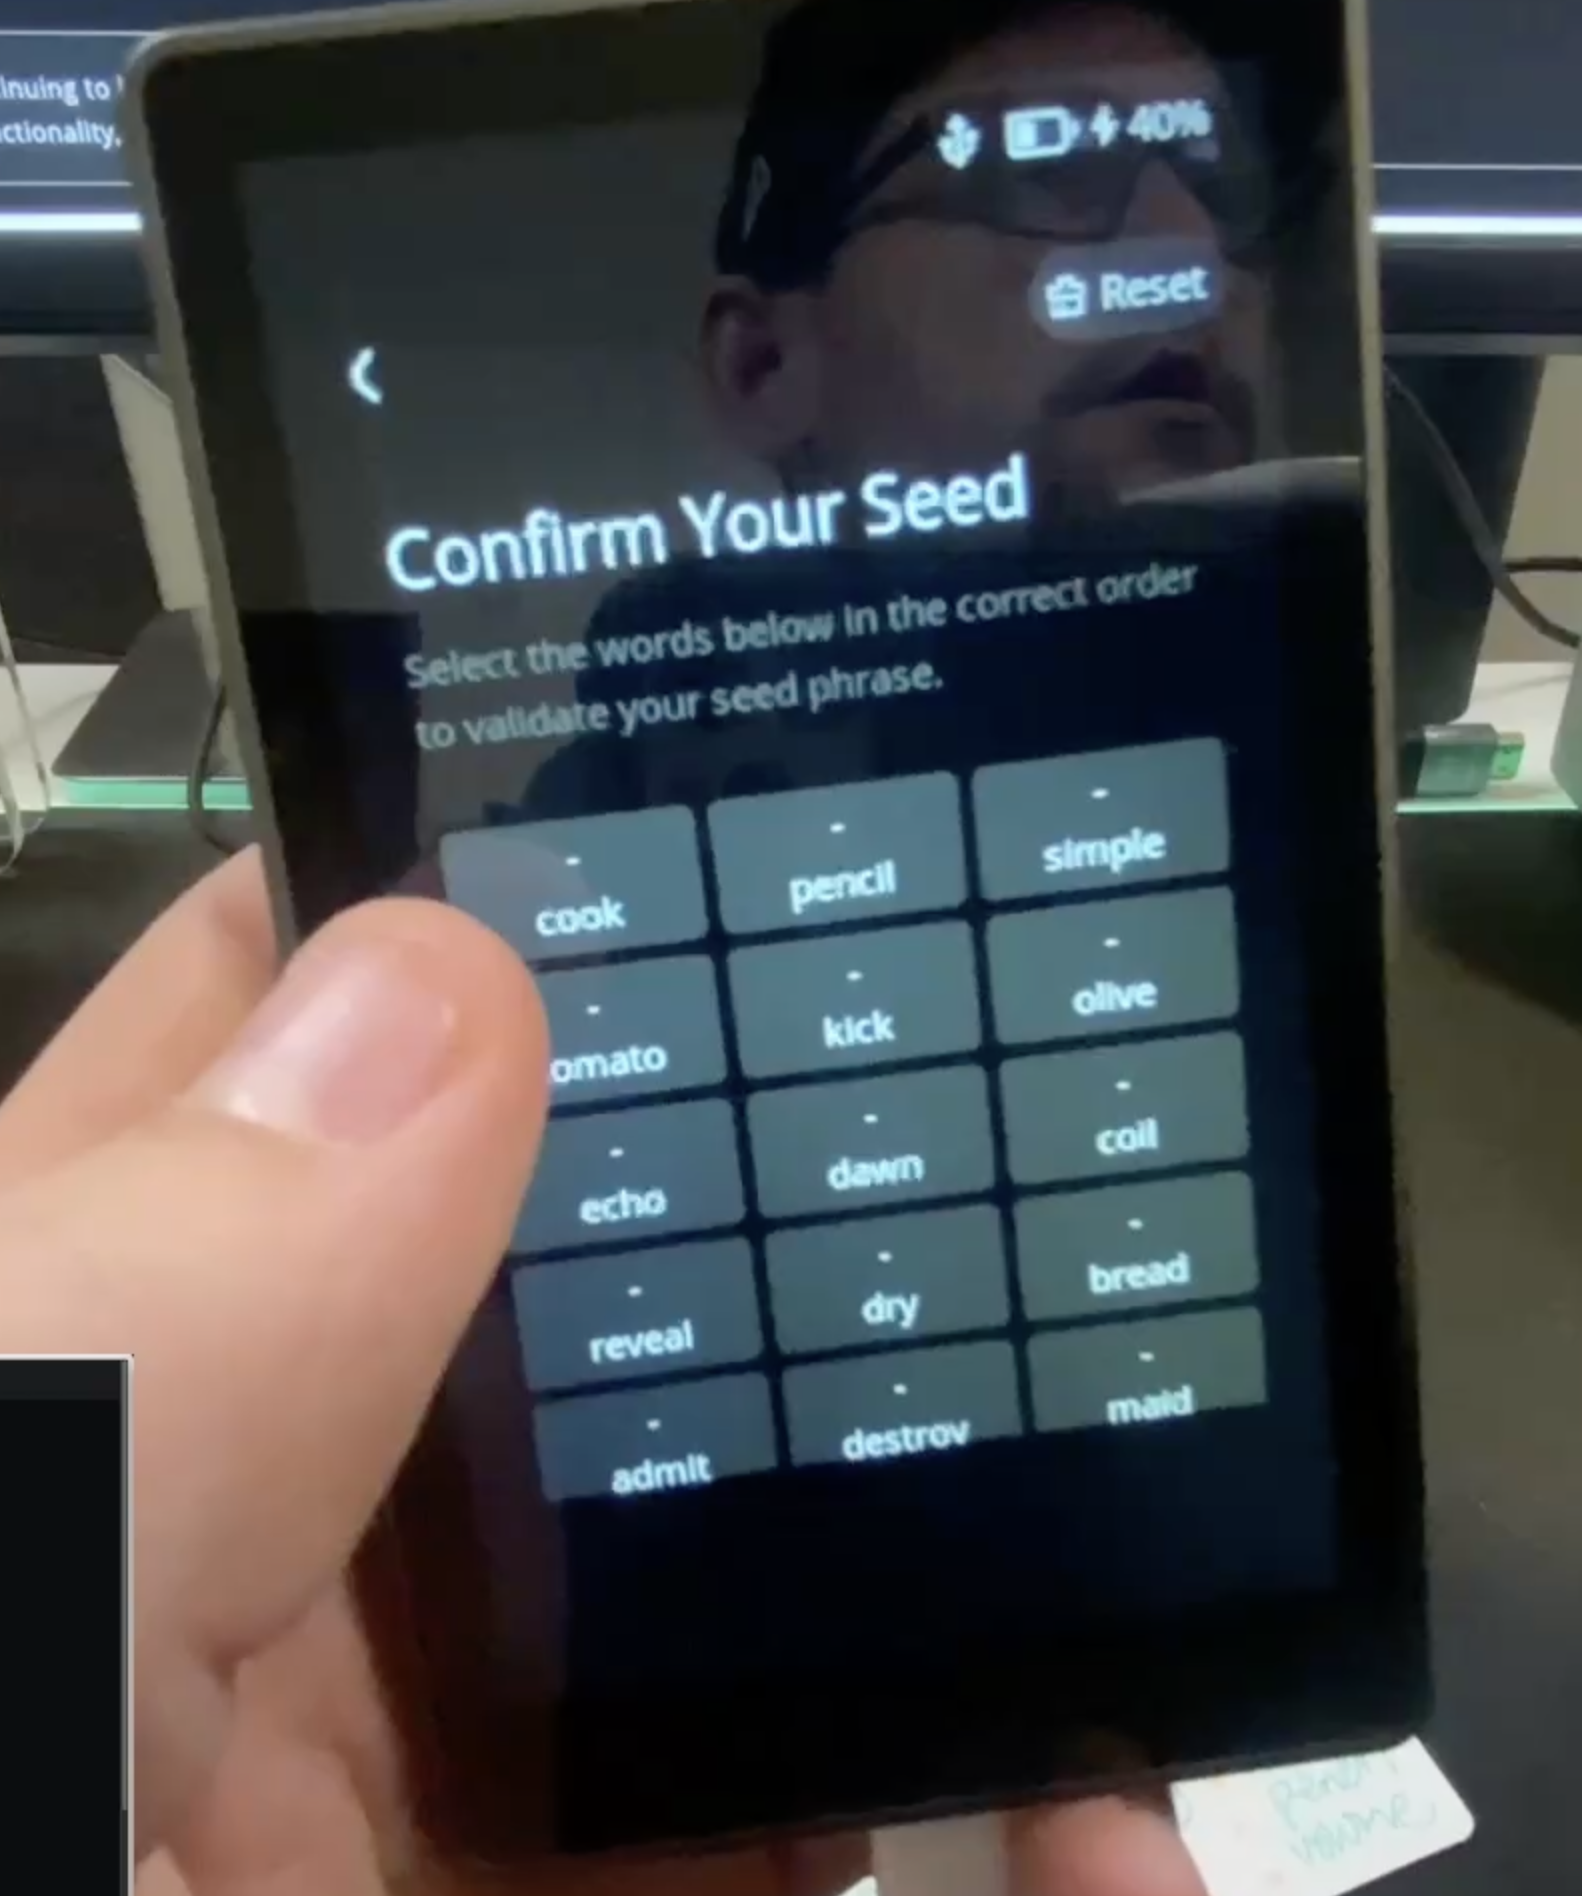
- The device will generate a 24-word seed phrase. Write down this seed phrase on the Secret Recovery Sheet provided and store it in a secure place. You can also use the Keystone Tablet for extra protection against fire and rust.
- Confirm the seed phrase by verifying the words in the correct order as displayed on the screen.
- Importing an Existing Wallet:
- Choose "Import Wallet" if you have an existing seed phrase from another compatible wallet.
- Enter your seed phrase using the on-screen keyboard and confirm it to import your wallet.
It is crucial to generate your seed phrase offline and store it securely (I like using CryptoTags) . Avoid importing seed phrases generated online, as they may already be compromised.
3. Integrating Keystone 3 Pro with Nunchuk
What is Nunchuk?
Nunchuk is a mobile app designed to manage Bitcoin transactions seamlessly. It supports various address types, including Native SegWit, Nested SegWit, and Legacy, making it a versatile choice for Bitcoin users. Integrating your Keystone 3 Pro with Nunchuk allows you to manage your Bitcoin transactions securely and efficiently.
Setting Up Nunchuk with Keystone
Follow these steps to integrate your Keystone 3 Pro with the Nunchuk app:
- On your Keystone 3 Pro, tap the "..." icon at the top right and select "Connect Software Wallet."
- Choose "Nunchuk" from the list of options. A QR code will appear on your Keystone screen.
- Open the Nunchuk app on your mobile device, tap the plus (+) button next to "Keys," and select "Add an air-gapped key."
- Press "Continue" and name your key in the key name field.
- Tap "Scan QR" and use your mobile device’s camera to scan the QR code displayed on your Keystone device.
- Follow the prompts to select a path for your Bitcoin address and click "Add key."
- Return to the Nunchuk home page, tap the plus (+) button next to "Wallets," and click "Create a new wallet."
- Name your wallet, customize the address type, and click "Continue."
- Select the key you created earlier, then click "Create a wallet," and finally, "Done."

Using Nunchuk for Transactions
Once your Keystone 3 Pro is integrated with Nunchuk, you can easily manage your Bitcoin transactions:
- Receiving Bitcoin:
- Select the wallet you have created in Nunchuk.
- Click the "Receive" button to display a QR code and address for receiving funds.
- Sending Bitcoin:
- Select the wallet you have set up and click the "Send" button.
- Enter the amount you wish to send and click "Continue."
- Input the recipient’s address and a note, then click "Create transaction."
- Choose the "Sign" button next to the key icon.
- Select "Export transaction" and then "Export via QR." Scan the QR code with your Keystone device to verify transaction details before signing.
- In Nunchuk, choose "Import signature" and scan the QR code on your Keystone to complete the transaction.
Using Keystone’s decoding features, you can ensure you are always aware of the transaction details, protecting yourself from phishing attacks and other fraudulent activities. This built-in security feature is invaluable for ensuring the safety of your digital assets, as it allows you to double-check all transaction details before confirming them.
Following these steps, you can fully utilize the Keystone 3 Pro’s capabilities with the Nunchuk app, ensuring a streamlined and secure Bitcoin management experience.
This guide provides a comprehensive overview of setting up and using your Keystone 3 Pro hardware wallet. You can confidently manage your Bitcoin transactions with enhanced security by understanding the key features, ensuring secure setup and device verification, and effectively integrating with the Nunchuk app.
The official Keystone documentation provides more detailed information, including specific troubleshooting tips and advanced features.
Join my Discord or DM me on 𝕏 if you have any questions. To learn more about Keystone and some of my other favorite hardware wallets check out this playlist: